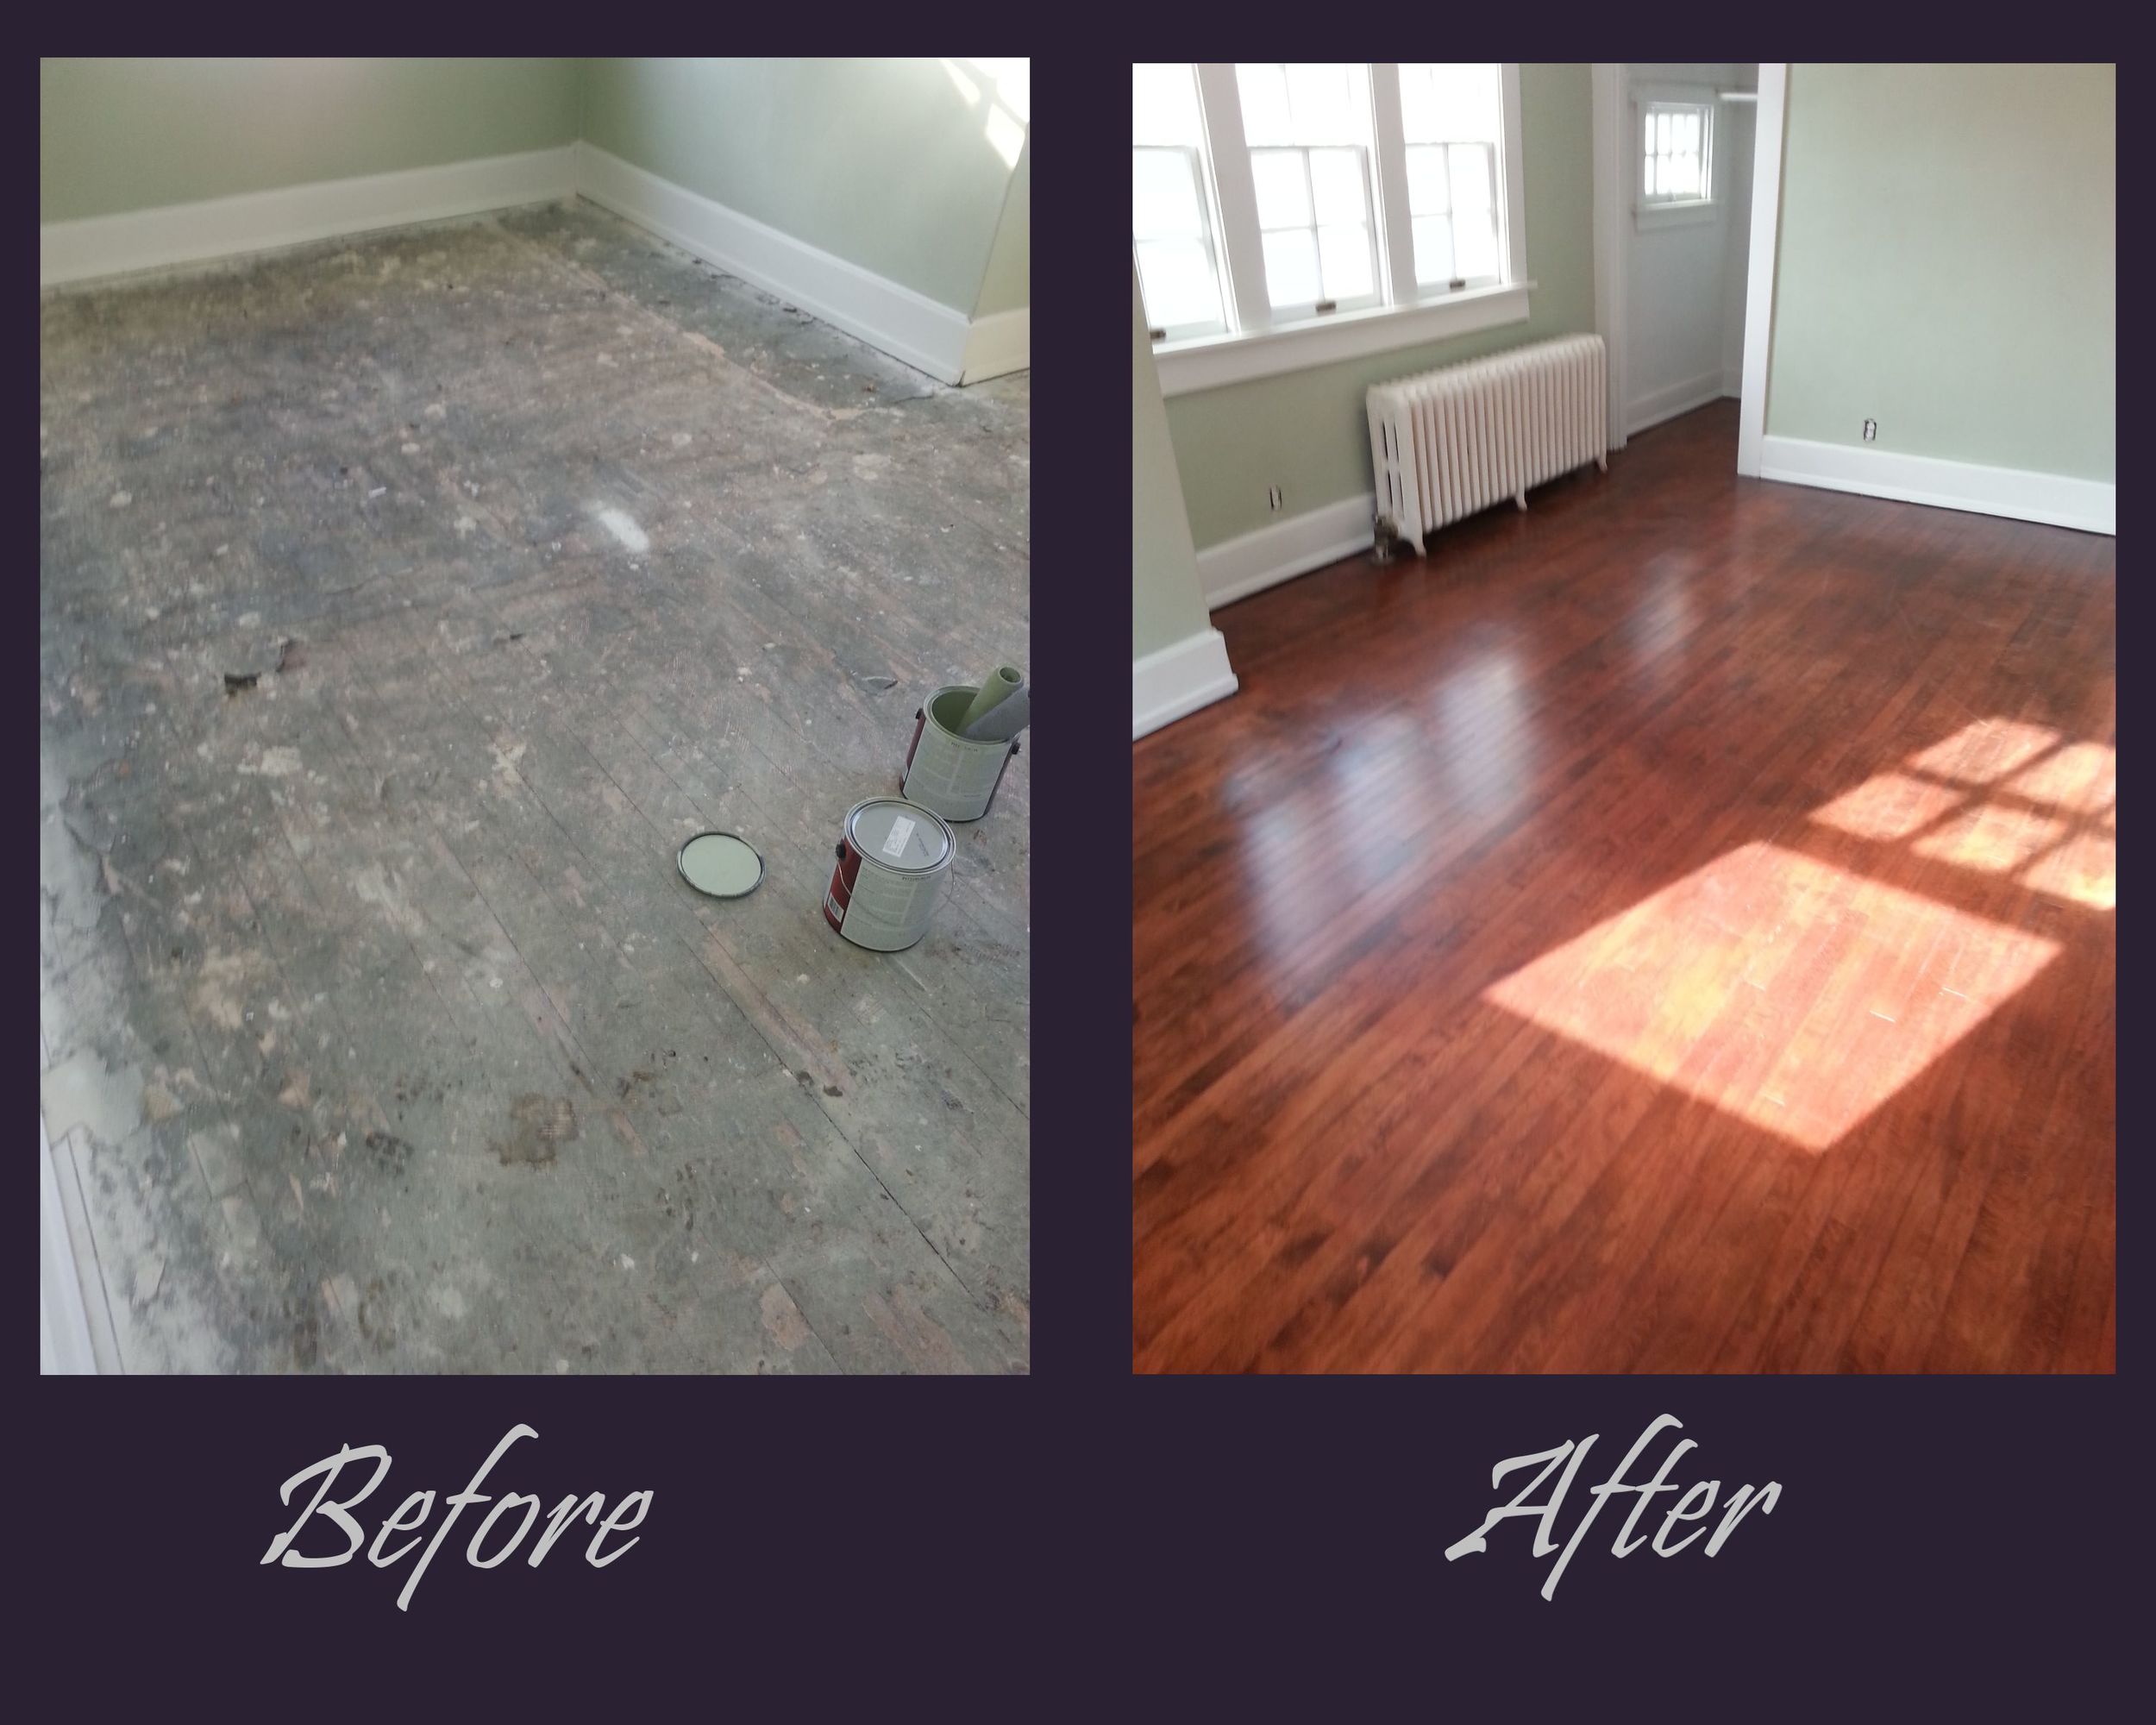
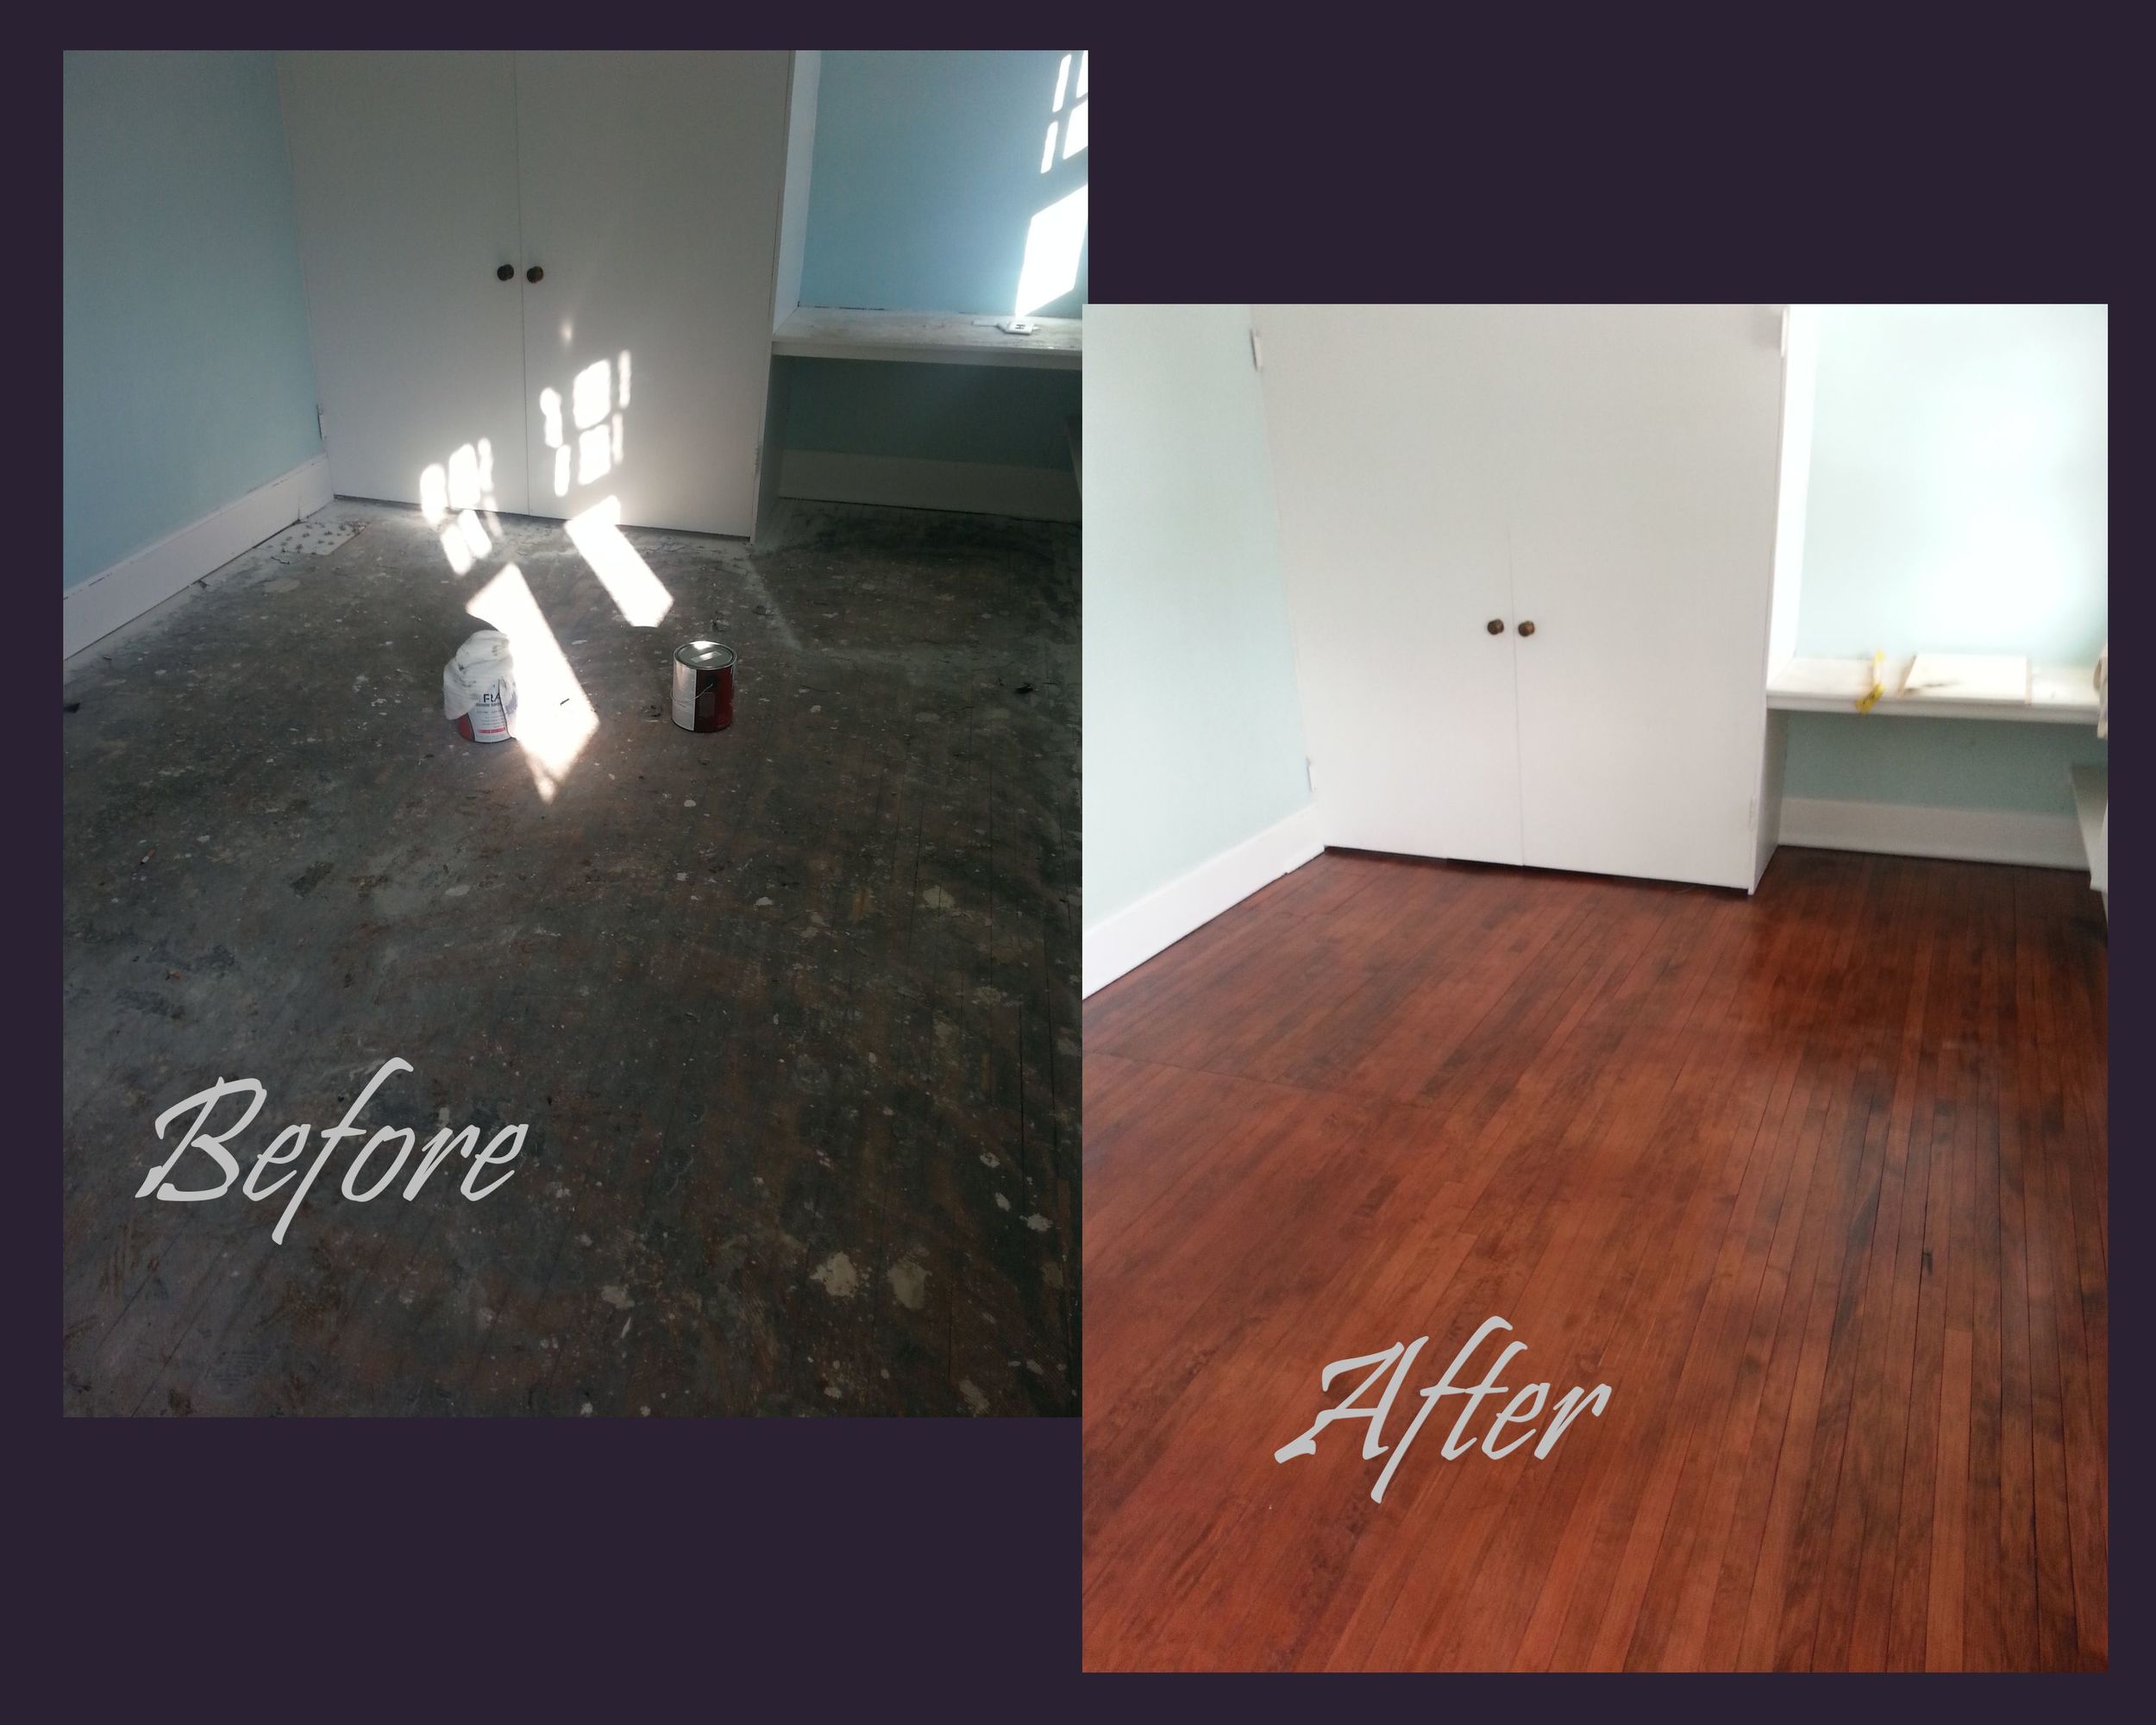
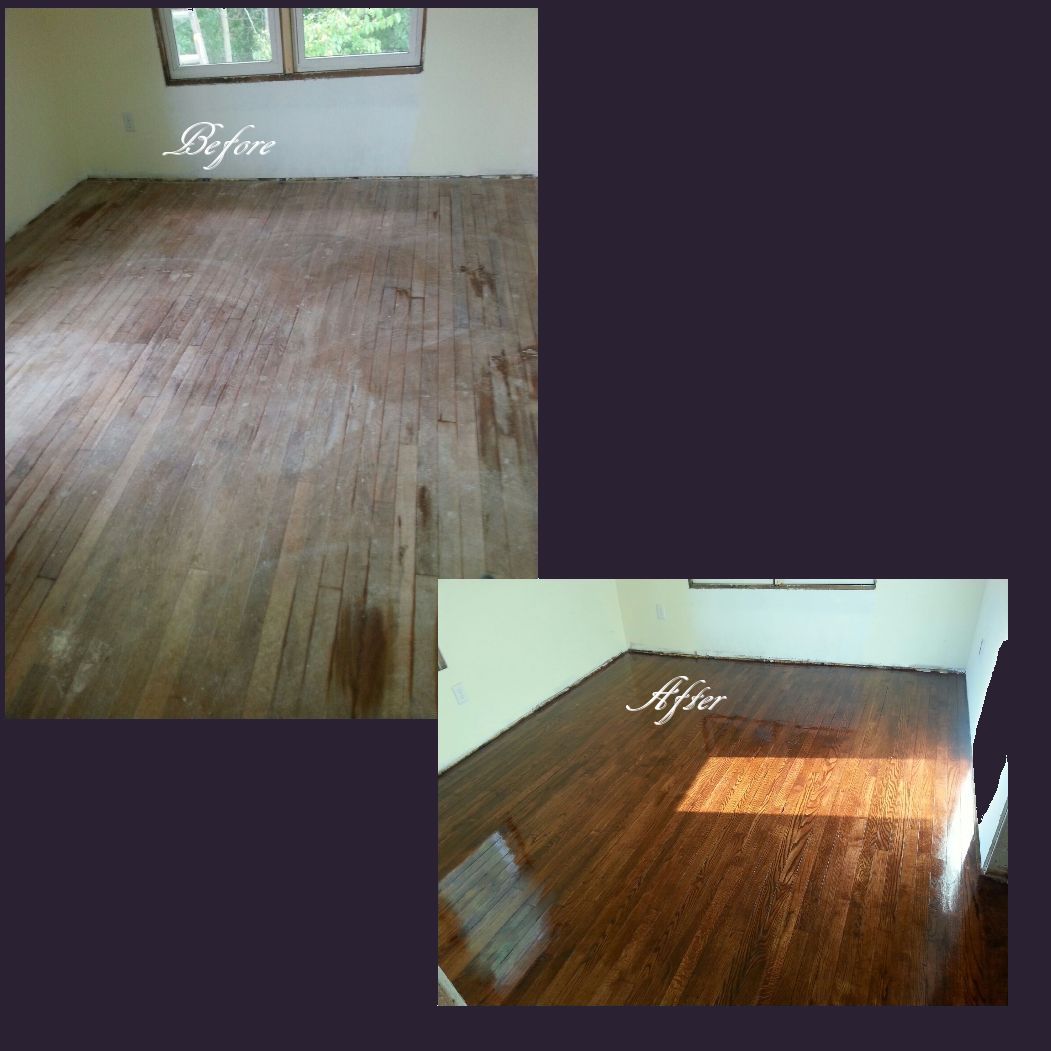
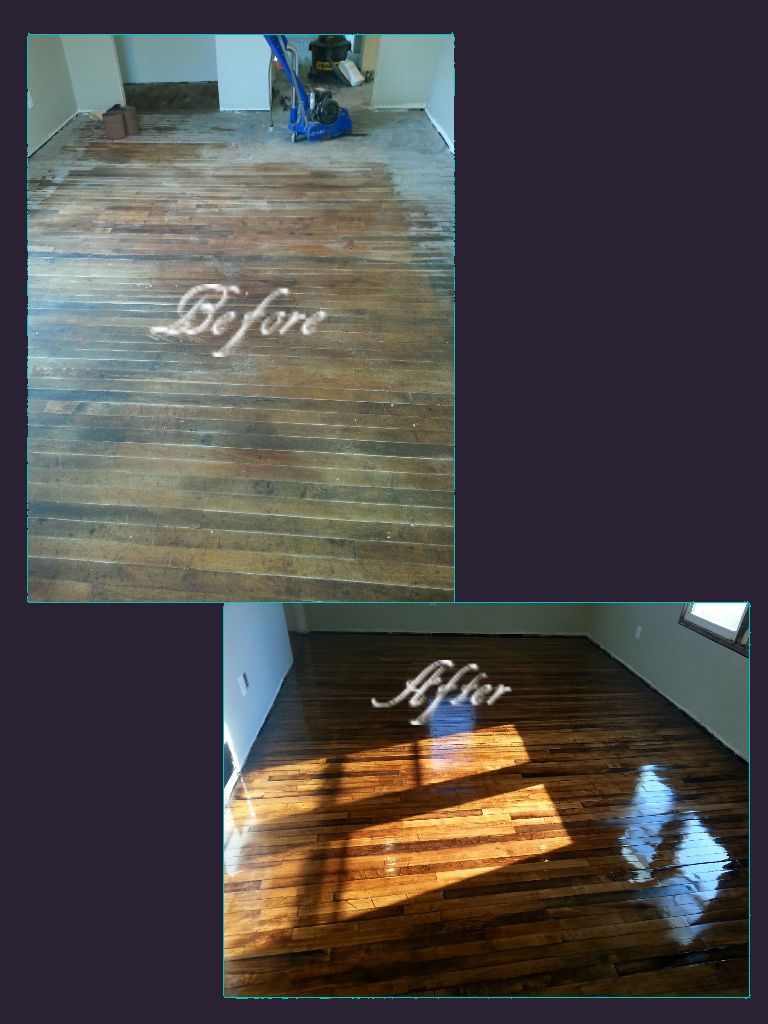
Hardwood Floor Refinishing
Hardwood Floor Refinishing
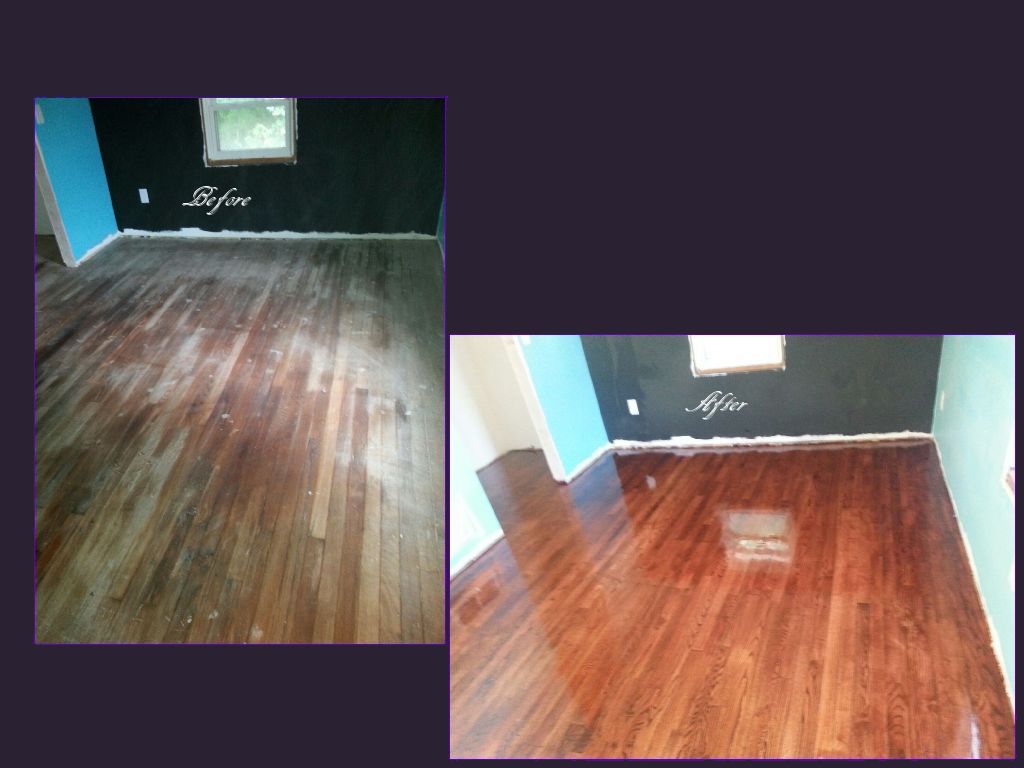
When I was originally being taught this trade I was told a blind man is the best at refinishing floors. Logically however, refinishing a floor with your eyes closed isn’t exactly a novel idea. The concept nonetheless is astute. A blind man relies on the feel of the floor, his fingers becoming his eyes. When refinishing floors just because it looks acceptable doesn’t mean it is and if you’re untrained you typically aren’t going to find out until you put the stain on. Just because you’ve done all the steps from start to finish doesn’t mean you’ve done them correctly. I have gotten several calls from homeowners requesting advice on how to sand wood floors. I will gladly explain the process to anyone that has the time to listen. But I will say this just like people, each floor is marginally different than the last. From the rough cut to the final buff each step changes and each step is just as important as the last.
Our process
- Step One: Preparation for sanding.
- This involves cleaning the room out. Customarily this should be done before we arrive, but we are flexible.
- Sealing the area off from the rest of the house to prevent dust from traveling through the entire house.
- Protecting or removing the trim.
- Fixing any issue with the floor. This is when we would make the repairs.
- Step Two: Sanding
- Using a combination of large sanders, small sanders, scrappers, and good old manual labor, here is where we make the action happen.
- We remove the top layer of the floor to expose the wood. Starting with sand paper as low as 16 grit and working our way up to the finish cut.
- Step Three: Buffing
- Before I put a finish on, I buff the floor. This helps blend the sanding to a nice uniform finish.
- Step Four: Clean up and Inspection
- At this time we do a full vacuum and a wipe down on the floor.
- We inspect the entire floor for any imperfections.
- Step Five: Application of the stain and finish
- Depending on what was selected for stain and finish we follow the manufactures recommendations on the application of the stain and finish.
- This is the part that normally the most time consuming you can’t rush how fast paint dries. Depending on the finish type the process can take up to 3 days to dry.
Hardwood Flooring Finish Types
The majority of finishes are polyurethane. In my opinion, poly is best when considering cost vs durability option. There are two main types of polyurethane, water and oil based. With either, they both have their pros and cons.
What’s the difference?
1. The biggest difference between oil based polyurethane and water based polyurethane is appearance. The best way for me to describe the difference is that water based polyurethane makes the wood appear the same as when we sanded it. There is no color change. Oil based polyurethane makes the wood appear like it does when it is wet a slight yellow or amber.
2. Dry time is another difference 4 coats of water based finish can be applied in a day when oil based will take about 3 days.
3. Durability, Oil based polyurethane is a harder finish under normal use. It will usually last 5 to 7 years before the floor start to show signs of wear. Water base will start to show wear in 2 to 4 years.
4. Cost. Oil based polyurethane is about half the price of water based polyurethane.
5. Odor. Water based polyurethane is next to odorless Oil based polyurethane fumes are very strong and will linger for a few hours after application.
Both water and oil based polyurethane come in high gloss, satin and low gloss.